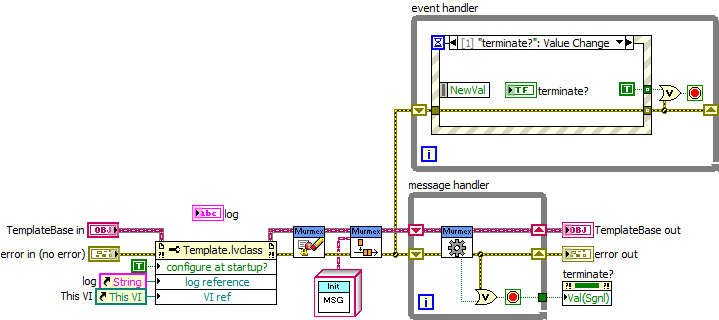
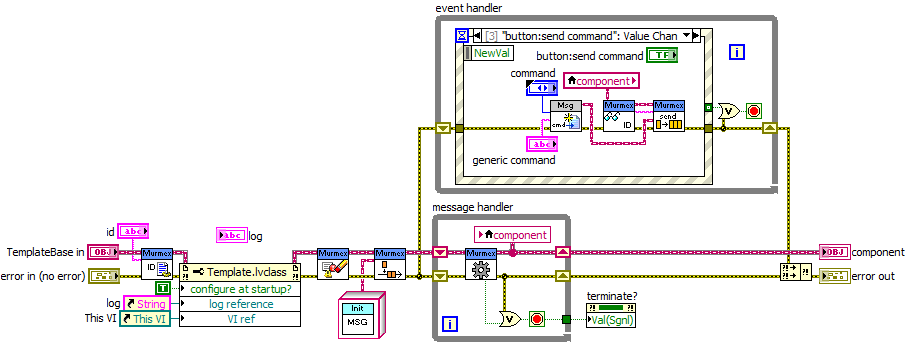
The basic design of Murmex is demonstrated here. The basic design is upgraded from the minimal design from the previous tutorial. The advantage of this one is that you can stop the program, configure it easily and update your own settings.
Basic design
- Add to the front panel a Boolean indicator (can be hidden from view), called “terminate?”.
- Make a property node for the boolean indicator “terminate?” and wire it to the boolean of the message handler loop and use the Val (Sgnl) method.
- Add above the message handler loop an event handler loop.
- Add an event case for the “terminate?” and stop the event handler loop when value changes.

- Rename the class data output to “component” and make a local variable to which you write to after the Handle message method.
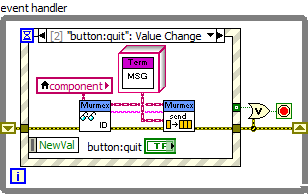
- Add to the front panel a boolean control “Quit” and add an event to the event handler.
- Add a local variable of the class to read from (see step 5) and use the methods “Get ID.vi” and “Send.vi”. The latter method will send a message to the given recipient, which is in our case ourself.
- Add the TerminateMessage as input for the Send method. You can get this method from the Murmex library in your Project Explorer.

- Add to the front panel a boolean indicator “Send”.
- Add an event case to the event structure to respond to the value change of the Send button.
- Drag and drop from the Message.lvclass class file in the Murmex library the method “Create from command.vi” and create the controls for the inputs.
- Add as in Step 7 the local variable of the class, the method Get ID and the method Send and wire them properly.

- On the front panel, give the control “id” a proper name.
- Start the program